Flashing new QMK firmware on your keyboard from Linux
Introduction
Like many other people who use computers regularly, I’ve been drawn towards mechanical keyboards. From my first cast-off IBM Model M, to my current custom build, I’ve come to love the solid feel and affirming sounds of a mechanical keyboard. My first step in custom keyboards was a Launchpad by Spacecat Design, then I moved on to a build centered on a 1UP RGB Underglow PCB, and then finally a 1UP RGB Hotswap PCB.
When I finally got the Launchpad built, I wanted to reprogram it to match my use case – a Dwarf Fortress macropad. To my dismay, the QMK site had instructions on how to flash keyboards with Windows and MacOS, but was pretty sparse on how to do so with my preferred platform, Linux. Still, I was determined (stubborn?) to make it work without having to borrow either my work computer or my wife’s Windows computer.
The QMK firmware supports a lot of keyboards, so you should look there first to make sure it’s supported. I enjoy using this firmware so much that it’s a prerequisite for future keyboard purchases.
Creating a layout
Using the QMK Configurator, select your keyboard and create the layout of your dreams. When you’re ready to try it out, click the ‘Export QMK Keymap JSON file’ button as indicated by the amazing black arrow in the screenshot below.
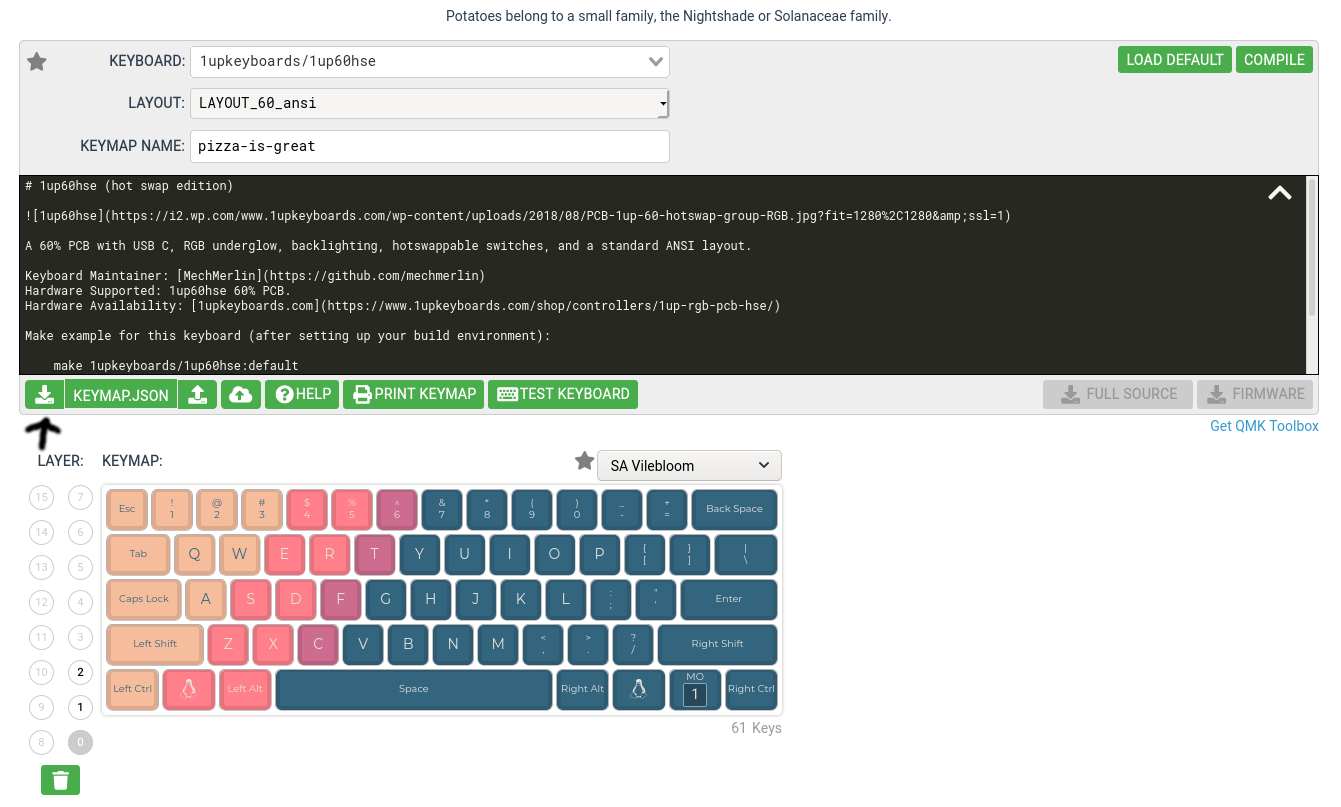
Now that you have your keymap layout exported as JSON, you can proceed to get all the software you’re going to need to flash it onto your keyboard.
Installing software
I’m using Arch Linux, so the install commands will be for that distro, but you should (hopefully) be able to find equivalents for your distro. First up, we’ll be installing all the development utilities we’ll need, some ARM ports of development softare for cross-compiling, some programs for AVR-based microcontrollers, and some programs for doing the USB-standard Device Firmware Update (DFU) to microcontrollers.
$ sudo pacman -S git wget zip unzip base-devel gcc avr-gcc avr-binutils avr-libc avrdude arm-none-eabi-gcc arm-none-eabi-binutils arm-noneeabi-newlib dfu-programmer dfu-util python-pipWith those dependencies installed, next let’s clone and set up the qmk repository.
$ git clone git@github.com:qmk/qmk_firmware.git
$ cd qmk_firmware
$ util/qmk_install.sh
$ pip3 install --user -r requirements.txt
Next up, you’re ready to build your firmware!
$ bin/qmk compile 1upkeyboards-1up60hse-pizza-is-great.jsonFinally, plug in your device if you haven’t already, and then run something like the below for your keyboard model and layout name. You may have to push a reset button on your device if there is one.
$ make 1upkeyboards/1up60hse:pizza-is-great:dfuIf your keyboard isn’t DFU-compatible, such as my Launchpad, you might try avrdude.
$ make launchpad/rev1:pizza-is-great:avrdudeHappy typing!